Re-admission
A re-admission must be completed once per year to confirm that the information provided during admission remains accurate and up to date. It applies to Service Users and Service Providers alike. For login, dashboard, and the initial admission, see Admission Tool - User Manual.
The contact with access to the Admission Tool receives a reminder email 30 days before the re-admission due date. At that point, the status of the case changes to Open for Re-Admission and the re-admission process can be started.
If the re-admission is not submitted by the due date, the case status changes to Overdue. The bLink team then contacts the participant to complete the re-admission as soon as possible.
How to Complete a Re-Admission
-
Log in to the Admission Tool.
-
Open the case with the status
Open for Re-AdmissionorOverdue.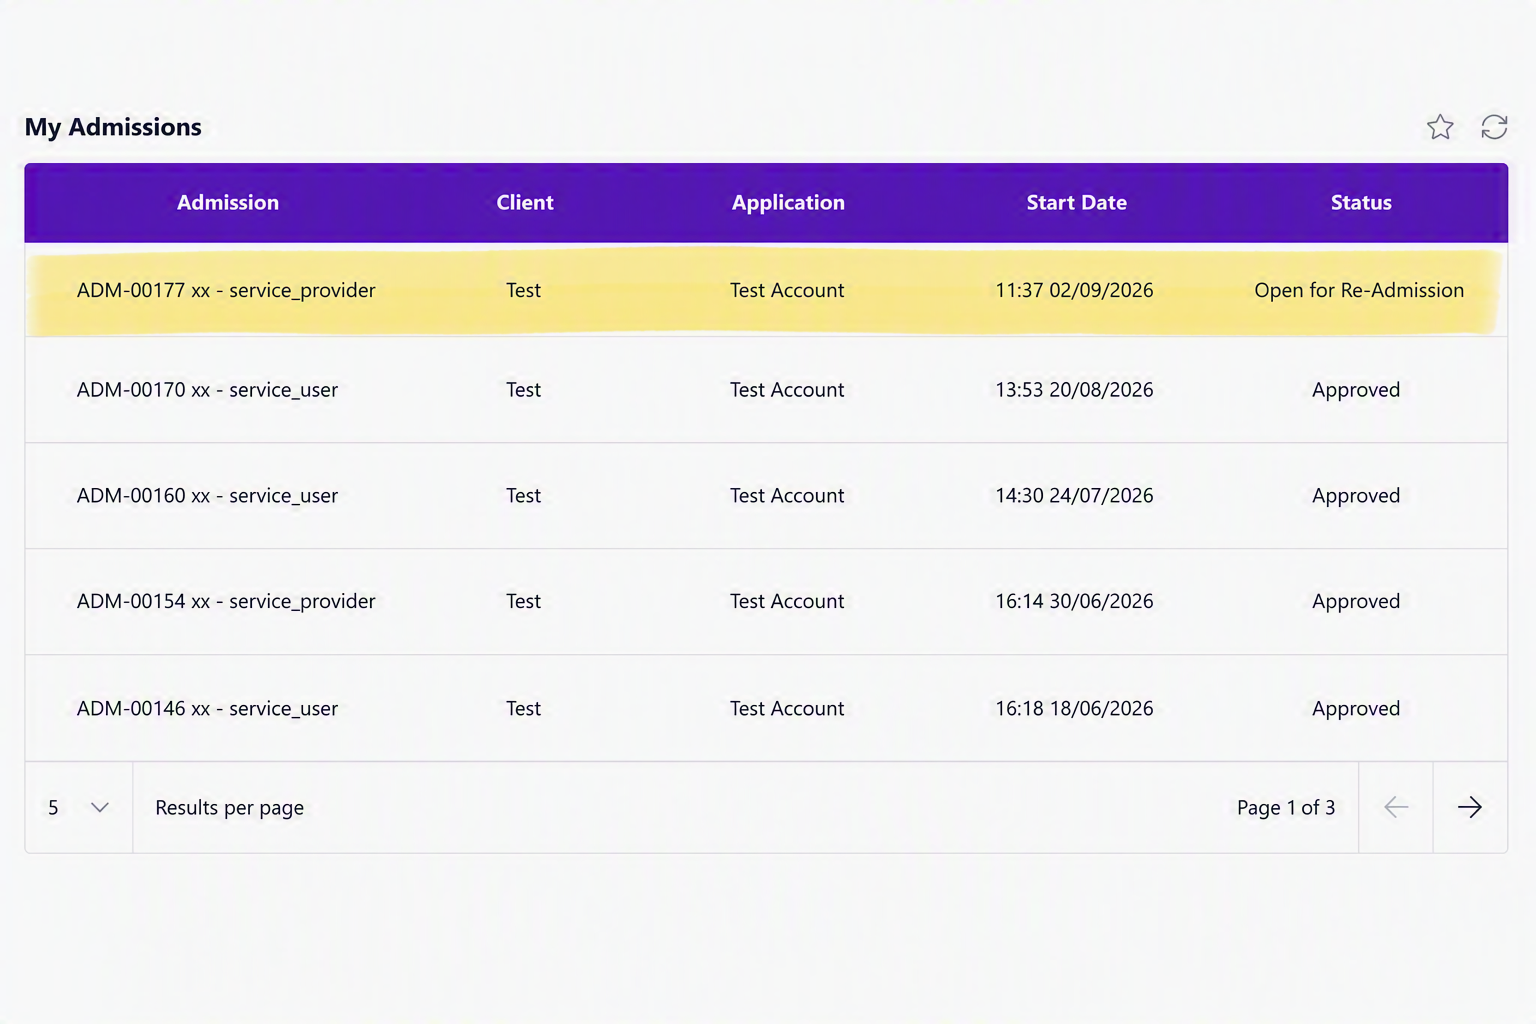
-
Click the
Start Re-admissionbutton in the top-right corner.
-
Click the
Go to My dashboardbutton.
-
Open the newly created case with the status
Re-Opened. The previous case is closed and set toCompleted.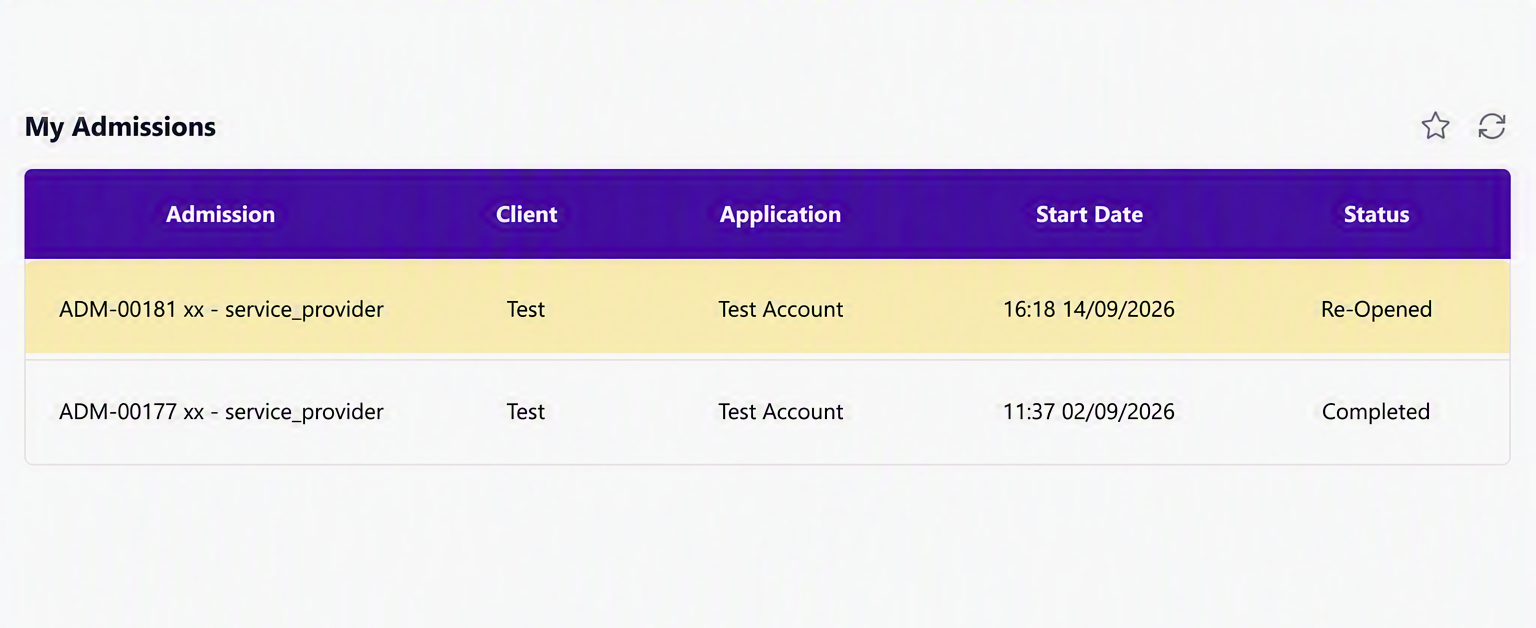
-
Review the information on the first page and click
Next. -
Review all information and documents in each tab. Complete any fields that require attention and update any information that has changed since the last admission or re-admission.
-
Navigate to the
Completiontab and confirm the declaration. -
Click
Submitin the top-right corner to submit the re-admission for review.
The bLink team reviews the submission and makes contact if additional information or clarification is required. Once the review is complete, the case is set to Approved. No further action is required until the next annual re-admission.